All of our xgenious Php Laravel Script Comes with support of google fonts by default. you can set any google front from our cms like Nexelit, Fundorex, Qixer etc from admin panel “General settings > typography settings”.
In this article i am going to guide you how you can add your own custom fonts support to the script.
Step 01:
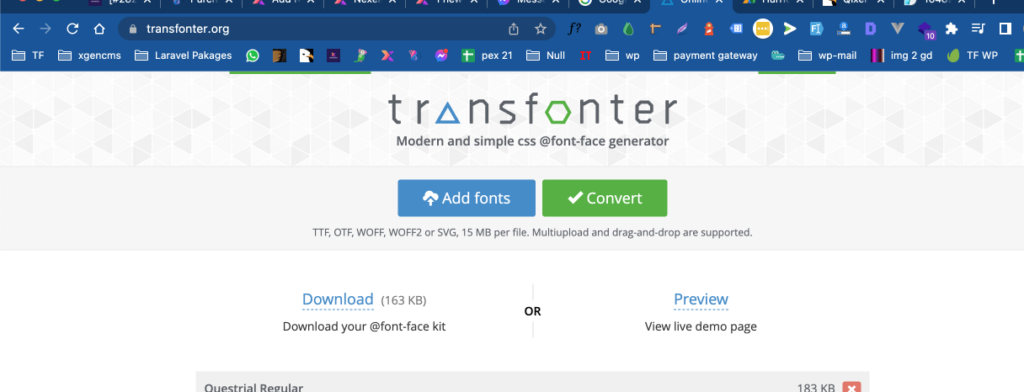
convert your font to webfont Front transfonter.org website simply upload your font and generate webfont from it.
Step 02:
after convert font to webfont you will see option to download the script or preview it, download the file and click preview you will see the have provide you code to add use this fronts. we need this code to add this fonts support in your scripts


Step 03:
now you have to upload the downloaded font file to server in “@core>assets/frontend/css/fronts” folder

Step 04:
now you have to link this fonts with the script go to “@core>resources>views>frontend>partials>header.blade.php”
add the link code you have got in the preview of transfonter.org website.

you have to edit this code a bit as like below

Step 05:
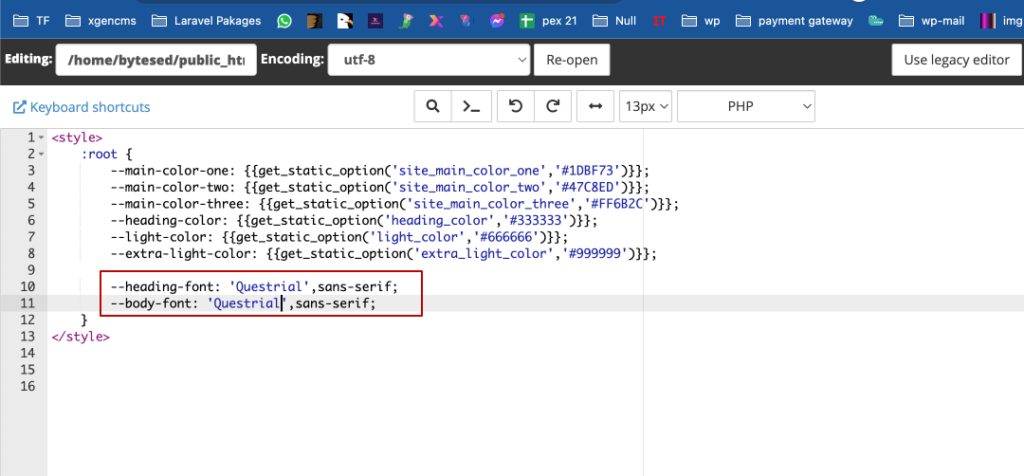
now you have to set your website font family with the custom font, you will your font family name in preview of transfonter.org website

to add this font-family support go to “@core/resources/views/frontend/partials/root-style.blade.php“
add your font family name here as like below

that’s it, your custom fonts support now added in the script. if you face any issue you can open a support ticket
